 CARLOS DIEGO C. P.
Technical Post · Amazon Ecs
Deploying a Docker container application on Amazon ECS
In today's post, we'll deploy an application running in a Docker container on Amazon ECS.
Keywords
In today's post, we'll deploy an application running in a Docker container on Amazon ECS.
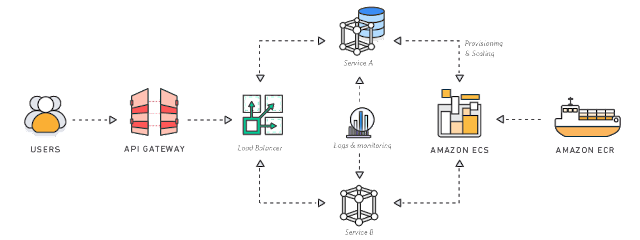
Amazon Elastic Container Service (Amazon ECS) is the Amazon Web Services service you use to run Docker applications on a scalable cluster. We'll see how to run a Docker-based application on an Amazon ECS cluster. The cluster will sit behind a load balancer, and then we'll test the environment.
Step 1: Set up your first run with Amazon ECS
In this step, you'll open the Amazon ECS console and run the wizard (https://console.aws.amazon.com/ecs/home#/firstRun).
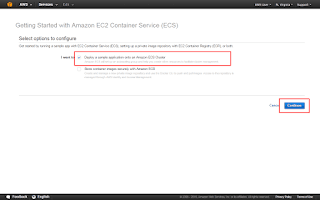
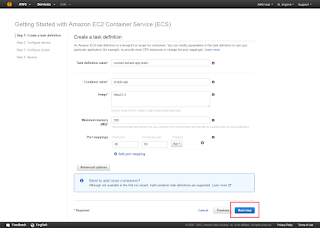
Step 2: Create a task definition
The task definition comes preloaded with default configuration values.
Step 3: Configure your service
a) Configure the service options:
- Service Name: the default value sample-webapp is a web-based “Hello World” application provided by AWS. It's designed to run indefinitely;
- Desired number of tasks: to stay within the AWS free tier, keep the default value of 1;
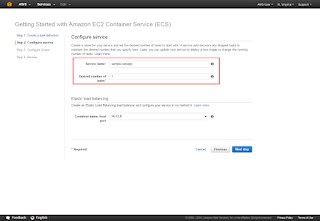
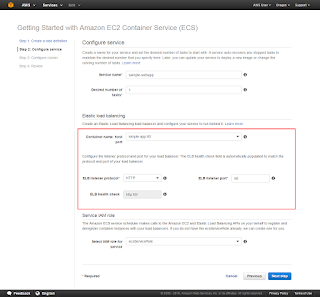
b) Elastic load balancing: you have the option of using a load balancer with your service.
- Container name: host port: select Simple-app:80.
- The default values for ELB listener protocol, ELB listener port, and ELB health check are configured for the sample application.
c) Before you can attach a load balancer to an Amazon ECS Service, you need to create an Identity and Access Management (IAM) role for your services to use.
- If you don't have a service IAM role yet, Amazon ECS will create one named ecsServiceRole.
- If you already have an Amazon ECS Service role, select it from the drop-down menu.
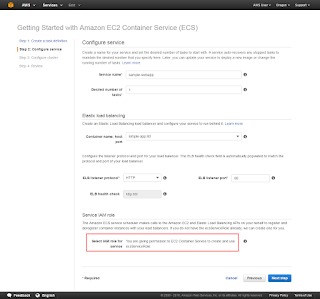
d) Review your settings and select Next Step.
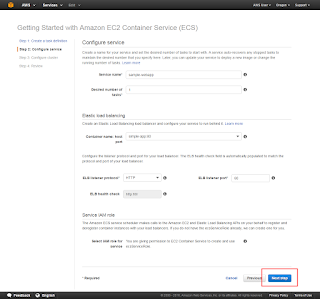
Step 4: Configure your cluster
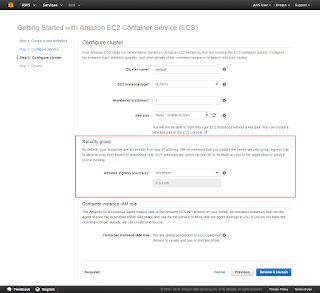
a) Use the configuration settings below:
- Cluster name: enter sample-cluster.
- EC2 instance type: the default t2.micro instance type will keep you in the free tier. Instance types with more CPU and memory resources can run more tasks. For more information about the different instance types, see Amazon EC2 Instance Types.
- Number of instances: leave the default value of 1 to launch one Amazon EC2 instance in your cluster, where tasks will be placed. The more instances you have in the cluster, the more tasks you can place in it.
- Key pair: you'll need a key pair to SSH into the instances later. You can keep the default selection None — unable to SSH, select an existing key pair, or create one in the Amazon EC2 console.
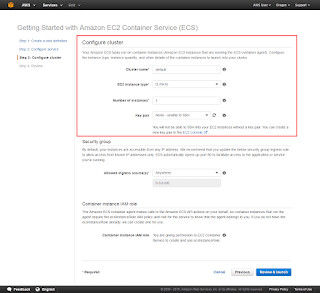
b) (Optional) Security Group: the default value (Anywhere) allows access from anywhere on the internet. You can also select a CIDR block that restricts access to your instances.
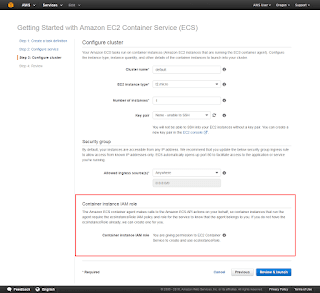
c) Container instance IAM role:
- If you don't have an IAM role, the Amazon ECS wizard will create one for you.
- If you have an existing container instance IAM role, select it from the drop-down list.
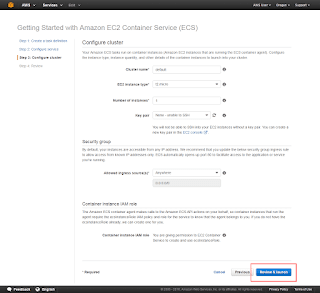
d) Select Review and Launch.
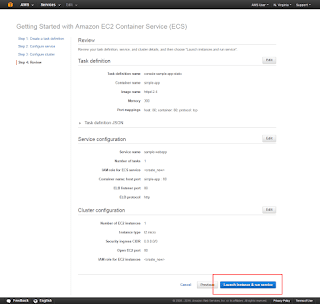
Step 5: Launch and view your resources
a) You'll have one last chance to review the task definition, along with the task and cluster settings, before launching. Select Launch instance & run service.
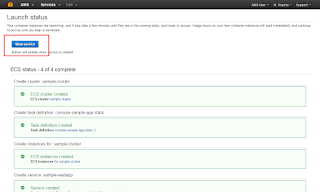
b) You're now on the Launch Status page, which shows the status of your launch and describes each step of the process.
Once the launch is complete, select View service.
Step 6: Open the sample application
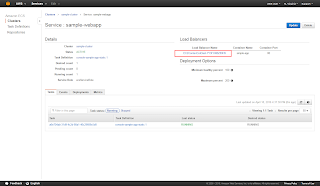
a) On the sample web application (sample-webapp) page, click the name of your load balancer.
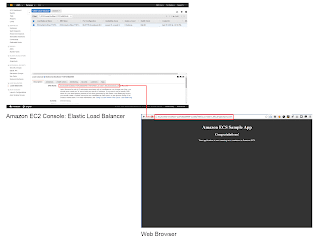
b) Now you'll test the sample application:
- Copy the ELB DNS name.
- Paste it into a new browser window.
- View the sample application.
If you have any questions or run into any problems with this tutorial, feel free to get in touch. ;-)
See you in the next post! =)
Comments
Every comment is moderated before it appears here. Nothing is published automatically.
Loading…